Heat Is the Enemy: Understanding and Eliminating Thermal Gradients in Your Imaging Setup
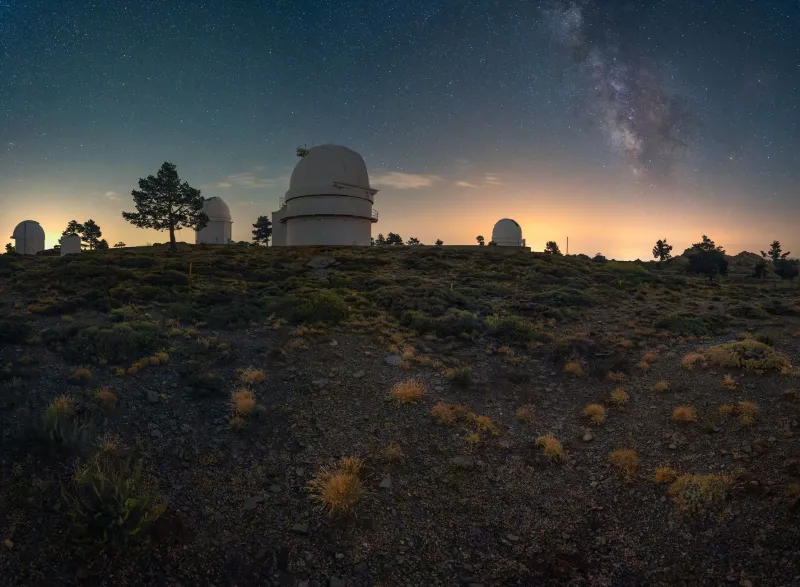
Every astrophotographer knows the frustration of reviewing a night's data and finding soft stars, smeared detail, and a general lack of crispness that the forecast promised would not be there. Atmospheric seeing gets the blame most often — and sometimes rightly so. But a significant portion of that degradation may never have touched the open sky at all. It originated inside the telescope tube, inside the dome, or inside the camera itself, in the form of thermal gradients: invisible boundaries between air masses of different temperatures that bend and scatter light just as surely as a flawed lens element.
For imagers serious about pushing the limits of their equipment, understanding thermal management is not optional. It is foundational.
What Thermal Gradients Actually Do to Light
Air is not optically neutral when it is in motion or when adjacent pockets exist at different temperatures. Warm air is less dense than cool air, and that difference in density translates directly into a difference in refractive index. Where two air masses of different temperatures meet — whether inside a Newtonian tube or drifting across an open dome slit — light rays bend unpredictably. The result at the focal plane is a wavefront that has been distorted in ways that no amount of collimation or focusing can correct after the fact.
Inside a telescope tube, this phenomenon is called tube currents. A primary mirror that is even two or three degrees Celsius warmer than the ambient air will radiate heat upward toward the secondary and beyond, creating a column of rising warm air directly in the optical path. Under magnification or long focal length, the effect is unmistakable: stars boil, planetary detail shimmers, and the diffraction pattern that should ring a well-collimated Cassegrain becomes a smeared blob.
The sensor itself is another heat source that is frequently ignored. CMOS and CCD chips generate heat during operation, and while thermoelectric coolers in dedicated astronomy cameras manage sensor temperature, the heat they pump away has to go somewhere. In an enclosed tube assembly or a poorly ventilated focuser drawtube, that heat accumulates and feeds exactly the kind of gradient that destroys resolution.
Diagnosing the Problem in Your Own Setup
The good news is that thermal issues leave recognizable signatures, and identifying them does not require expensive equipment.
Defocused star testing is the simplest starting point. Defocus a bright star until its Airy disk expands to a large, even ring. In the presence of tube currents, that ring will not be uniform. Instead, it will show a characteristic boiling or asymmetric shimmer that persists even on nights of otherwise steady seeing. Rotate the telescope to a different orientation; if the distortion rotates with the tube rather than staying fixed relative to the sky, the problem is internal.
Ronchi grating testing, borrowed from mirror-making tradition, can reveal the signature of thermal gradients with greater precision. Sliding a Ronchi eyepiece through focus while observing a bright star will show curved or wavy bands whenever a gradient is present, rather than the straight, parallel lines that indicate a thermally stable and well-figured optical system.
Time-of-night analysis is perhaps the most practical diagnostic for imagers who have already accumulated data. Compare the FWHM (full width at half maximum) of stars measured in frames taken immediately after opening the observatory against frames taken two or three hours later. A consistent improvement over time, independent of atmospheric seeing records, is strong evidence that the early part of the session was dominated by thermal settling — and that the equipment was not given adequate time to equilibrate before imaging began.
Passive Strategies That Cost Almost Nothing
The most effective and least expensive intervention is simply time. Opening the observatory, dome, or case at least 60 to 90 minutes before the start of a session allows optics, tube structures, and baffles to approach thermal equilibrium with the ambient environment. Many experienced imagers extend this to two hours or more for large-aperture instruments, particularly those with thick primary mirrors that store heat stubbornly.
Open-tube designs, such as truss Newtonians, have a natural advantage here. Without a sealed tube to trap warm air, convective currents dissipate more freely. Imagers using closed-tube designs — SCTs and Cassegrains in particular — can benefit from strategically placed ventilation ports at the rear of the tube, allowing warm air from the primary mirror cell to escape rather than rise through the optical path.
Mirror covers and insulating wraps can help prevent the telescope from warming during the day in the first place. A primary mirror stored at ambient night temperature before a session has far less thermal debt to repay once darkness falls.
Active Thermal Stabilization: Fans, Controllers, and Monitoring
For imagers who cannot afford the luxury of long cool-down periods, or who use large instruments with correspondingly large thermal mass, active cooling becomes worthwhile.
Primary mirror fans, either built into commercial mirror cells or retrofitted by the owner, draw cooler ambient air across the mirror surface and accelerate the equilibration process dramatically. Studies within the amateur community have documented cool-down time reductions of 50 percent or more with the addition of a three- or four-fan cell ventilation system. The fans should be run at low speed to avoid introducing their own mechanical vibration, and ideally switched off during actual exposures.
Temperature monitoring is the analytical backbone of any serious thermal management program. Inexpensive thermistor arrays or thermocouple loggers, placed at the primary mirror surface, the secondary spider, and the ambient air just outside the tube, allow the imager to track the thermal differential in real time. When the mirror-to-ambient delta drops below roughly 0.5 degrees Celsius, tube currents become negligible for most focal lengths. Some commercial telescope controllers now integrate this monitoring natively.
For observatory users, dome management is equally critical. A dome that has baked in afternoon sun and is then opened at nightfall creates a chimney effect, pulling warm air from the dome interior up through the slit and across the optical path. Dome fans that flush warm air out before and during the early session, combined with a white or reflective dome exterior to reduce daytime heat absorption, can reduce this ambient gradient substantially.
The Frame You Never Had to Throw Away
There is a particular satisfaction in reviewing a morning's data and finding that the first frame is as sharp as the last — that the session was thermally stable from the moment imaging began. That outcome is achievable, but it requires treating thermal management with the same deliberate attention given to polar alignment, focus, and guiding.
The optics in your telescope were engineered to resolve detail that the human eye cannot perceive unaided. Thermal gradients, whether lurking inside the tube or drifting across an unventilated dome, represent a ceiling that no firmware update or processing technique can raise after the fact. Address the heat, and the resolution you paid for becomes the resolution you actually use.
At CelestialFrame, we believe that capturing the universe faithfully means understanding every variable between the photon and the pixel. Thermal management is one of the most consequential — and most correctable — of them all.